Photography

Understanding Depth of Field: Aperture, Distance, and Focal Length Explained

Depth of field (DoF) is a crucial concept in photography, determining which parts of your image are in sharp focus and which are blurred. Mastering depth of field allows you to create more impactful and visually appealing photos. Let’s delve into the key factors that influence depth of field: aperture, distance, and focal length.

1. Aperture: Controlling Light and Focus

Aperture refers to the size of the opening in your camera lens through which light passes. It’s measured in f-stops (e.g., f/2.8, f/5.6, f/16). The aperture size directly impacts the depth of field:

  • Large Aperture (Small f-number): A wide aperture (e.g., f/1.8) creates a shallow depth of field, keeping only a small part of the image in focus while the background and foreground blur. This effect is ideal for portraits, isolating the subject from the surroundings.
  • Small Aperture (Large f-number): A narrow aperture (e.g., f/16) increases the depth of field, bringing more of the scene into sharp focus. This setting is perfect for landscapes where you want both the foreground and background to be clear.

2. Distance: The Subject’s Proximity

The distance between your camera and the subject also affects the depth of field:

  • Close Distance: When you are close to your subject, the depth of field becomes shallower. This proximity creates a stronger separation between the subject and the background, enhancing the subject’s prominence.
  • Far Distance: Moving further away from the subject increases the depth of field, bringing more elements of the scene into focus. This technique is useful for capturing expansive scenes or group shots where multiple elements need to be sharp.

3. Focal Length: Lens Characteristics

The focal length of your lens—measured in millimeters (mm)—influences the depth of field:

  • Short Focal Length (Wide-Angle Lenses): Lenses with shorter focal lengths (e.g., 24mm) naturally have a greater depth of field, making more of the scene appear in focus. Wide-angle lenses are commonly used in landscape photography to capture broad vistas with clarity throughout.
  • Long Focal Length (Telephoto Lenses): Lenses with longer focal lengths (e.g., 200mm) produce a shallower depth of field, even at smaller apertures. Telephoto lenses are excellent for portrait and wildlife photography, where isolating the subject from the background is desired.

4. Balancing the Factors

Achieving the desired depth of field involves balancing aperture, distance, and focal length. Here are some practical tips:

  • Portrait Photography: Use a large aperture (e.g., f/1.8) and a telephoto lens (e.g., 85mm) to create a shallow depth of field, blurring the background and making the subject stand out.
  • Landscape Photography: Opt for a small aperture (e.g., f/16), a wide-angle lens (e.g., 24mm), and focus on a point a third into the scene to ensure both the foreground and background are in focus.
  • Macro Photography: Get close to your subject with a macro lens and use a moderate aperture (e.g., f/8) to balance the depth of field, ensuring key details are sharp while maintaining a pleasing background blur.

5. Experiment and Practice

Understanding depth of field is both technical and creative. Practice by experimenting with different settings and observing the effects. Try varying the aperture, adjusting your distance from the subject, and switching between lenses to see how each factor influences your images.

Mastering depth of field empowers you to control the focus and blur in your photos, enhancing your ability to tell visual stories and create compelling images. Whether you’re aiming for a dreamy, blurred background or a sharply focused scene, knowing how to manipulate depth of field is a fundamental skill for any photographer.
Travel Photography: Telling Stories Through Your Lens

Travel photography is more than just capturing beautiful images; it’s about telling compelling stories through your lens. Each photograph should convey the essence of a place, its people, and its culture. Here are some tips to help you tell better stories with your travel photography.

1. Research Your Destination

Understanding your destination is the first step in capturing its story. Research the local culture, traditions, landmarks, and events before you go. This preparation will help you identify unique moments and locations that can tell a richer story.

2. Capture the Details

The details often tell the most interesting stories. Focus on capturing small, intimate elements like local cuisine, street signs, textures, and patterns. These details add depth to your travel narrative and provide context to your broader shots.

3. Photograph People

People are central to any story. Capture portraits of locals, but always ask for permission first. Candid shots can also be powerful, capturing people in their daily routines. Show the interactions and emotions of people to bring your travel stories to life.

4. Tell a Story with a Series

Rather than relying on a single shot, create a series of images that together tell a complete story. Start with wide shots to establish the setting, then move closer for mid-range shots, and finally, focus on details. This approach creates a visual narrative that guides the viewer through your experience.

5. Use Natural Light

Natural light can add mood and atmosphere to your photos. The golden hours—shortly after sunrise and before sunset—offer the best light for travel photography. Soft, diffused light can highlight textures and colors, enhancing the storytelling aspect of your images.

6. Experiment with Composition

Composition is key to effective storytelling. Use techniques like the rule of thirds, leading lines, and framing to draw attention to your subject. Vary your angles and perspectives to add interest and dynamism to your shots.

7. Include Environmental Context

To tell a complete story, include environmental context in your photos. Show the surroundings and background to give viewers a sense of place. This helps to situate your subjects within their environment and adds layers to your narrative.

8. Edit Thoughtfully

Post-processing is essential for refining your travel photos. Adjust exposure, contrast, and colors to enhance the mood and story of your images. However, be mindful not to over-edit; the goal is to maintain the authenticity of the scene.

9. Stay Patient and Observant

Great travel photography requires patience and observation. Spend time in one location, watch the light change, and wait for the perfect moment. Being patient allows you to capture genuine, unposed moments that tell authentic stories.

10. Reflect Your Personal Experience

Finally, make your travel photos personal. Capture what resonates with you and reflects your experience. Your unique perspective will make your travel stories more compelling and relatable.

Travel photography is a powerful medium for storytelling. By focusing on details, people, and the environment, and using thoughtful composition and lighting, you can create images that not only capture the beauty of your destinations but also convey their unique stories. Happy shooting!

How to Build Your Own Home Photography Studio on a Budget

Creating a home photography studio doesn’t have to be an expensive endeavor. With some strategic planning and smart purchases, you can set up a professional-quality studio in your home without breaking the bank. Here’s how to build your own home photography studio on a budget.

1. Choose the Right Space

First, identify a suitable space in your home. It could be a spare room, garage, basement, or even a corner of a large room. Ensure the area has enough room for your equipment and subjects, with good natural light if possible. A space with neutral-colored walls is preferable to avoid color casts in your photos.

2. Essential Equipment

You don’t need top-of-the-line gear to start; budget-friendly options can produce excellent results.

  • Camera and Lenses: Use your existing camera and invest in versatile lenses like a 50mm prime lens, which is great for portraits, or an 18-55mm kit lens for more flexibility.
  • Tripod: A sturdy, affordable tripod ensures sharp images and allows for hands-free operation.

3. Lighting Solutions

Proper lighting is crucial for any studio setup.

  • Natural Light: Utilize natural light from windows. Diffuse it with white curtains to soften harsh shadows.
  • Artificial Light: If natural light is insufficient, consider continuous lighting kits, which are more affordable than strobe lights. LED panels and softboxes provide even, adjustable lighting.
  • DIY Reflectors: Create reflectors using white foam boards or aluminum foil-covered cardboard to bounce light onto your subject, reducing shadows and enhancing detail.

4. Backdrops and Props

Backdrops and props add variety to your shots.

  • DIY Backdrops: Use plain walls, large sheets, or rolls of seamless paper in neutral colors like white, black, or gray. You can also get creative with textured fabrics or patterned wallpapers.
  • Budget Props: Gather inexpensive props from thrift stores, craft stores, or around your home. Items like chairs, stools, and small decor pieces can add character to your photos.

5. Post-Processing Tools

Editing your photos enhances their quality and professionalism.

  • Software: Invest in affordable photo editing software like Adobe Lightroom or free alternatives like GIMP. These tools offer powerful editing capabilities to refine your images.
  • Computer: Ensure your computer has enough processing power and storage for editing software and high-resolution images.

6. Optimize Your Space

Make the most of your studio space by organizing and optimizing your setup.

  • Storage Solutions: Use shelves, bins, and hooks to keep your equipment and props organized.
  • Mobility: Keep your setup flexible. Use rolling carts for lighting and gear, so you can easily reconfigure the space as needed.

7. Continuous Learning and Experimentation

Finally, continually learn and experiment with different setups, lighting techniques, and editing styles. Online tutorials, photography courses, and community forums are excellent resources for expanding your skills and knowledge.

Building a home photography studio on a budget is entirely achievable with careful planning and resourcefulness. By making smart choices with your space, equipment, and techniques, you can create a professional-quality studio that meets your photography needs without straining your finances.

Mastering the Art of Landscape Photography: Tips and Techniques

Landscape photography is a captivating way to capture the beauty of the natural world. Whether you’re an amateur photographer or a seasoned pro, mastering this art form requires a blend of technical skills, creativity, and patience. Here are some tips and techniques to help you elevate your landscape photography.

1. Choose the Right Gear

While any camera can capture stunning landscapes, having the right gear can make a significant difference. Invest in a good quality DSLR or mirrorless camera with a wide-angle lens. Wide-angle lenses (ranging from 10mm to 35mm) allow you to capture more of the scene, providing a broader perspective. Additionally, a sturdy tripod is essential for stability, especially in low light conditions.

2. Understand Light and Timing

Lighting is crucial in landscape photography. The golden hours—shortly after sunrise and before sunset—offer the most flattering light, creating soft shadows and warm tones. Overcast days can also be excellent for capturing more even lighting, reducing harsh shadows and highlights. Plan your shoots according to the time of day and weather conditions to make the most of natural light.

3. Compose Your Shots Thoughtfully

Composition can make or break a landscape photograph. Use the rule of thirds to create balanced and engaging images. Place points of interest along the gridlines or at their intersections. Leading lines, such as roads, rivers, or trails, can guide the viewer’s eye through the scene. Additionally, incorporating foreground elements can add depth and dimension to your photos.

4. Master Exposure Settings

Understanding exposure is key to capturing well-balanced landscape photos. Use a small aperture (high f-stop number) to achieve a greater depth of field, ensuring that both the foreground and background are in sharp focus. Adjust the shutter speed based on the lighting conditions; slower shutter speeds are ideal for capturing motion, such as flowing water or moving clouds. Always shoot in RAW format to preserve maximum detail and flexibility during post-processing.

5. Post-Processing for Perfection

Post-processing is where good photos become great. Use software like Adobe Lightroom or Photoshop to fine-tune your images. Adjust the exposure, contrast, and color balance to enhance the natural beauty of the scene. Be mindful not to over-edit; the goal is to enhance, not alter, the essence of your landscape.

By integrating these tips and techniques, you’ll be well on your way to mastering the art of landscape photography. Remember, practice is key, so get out there and start capturing the stunning vistas that await!

The Science of Shutter Speed: Capturing Motion and Light

Shutter speed is one of the three pillars of photography, along with aperture and ISO, that controls the exposure of your images. Understanding shutter speed and its impact on motion and light is essential for mastering your camera and achieving creative effects in your photography. Let’s dive into the science of shutter speed and explore how to use it effectively.

1. What is Shutter Speed?

Shutter speed refers to the length of time your camera’s shutter is open, allowing light to hit the sensor. It is measured in fractions of a second (e.g., 1/250s, 1/1000s) or in full seconds for longer exposures (e.g., 1s, 30s). A faster shutter speed means less light reaches the sensor, while a slower shutter speed allows more light in.

2. Capturing Motion

Shutter speed plays a crucial role in capturing motion. A fast shutter speed (e.g., 1/1000s) freezes fast-moving subjects, making it ideal for sports, wildlife, or action photography. Conversely, a slow shutter speed (e.g., 1/30s or longer) can create a sense of motion blur, which is perfect for artistic effects like smooth flowing water in a landscape or light trails in night photography.

Freezing Action:

To freeze action, set your camera to a high shutter speed. This is particularly useful for photographing athletes in motion, birds in flight, or any fast-moving subject. Higher ISO settings and wider apertures can help maintain proper exposure at fast shutter speeds.

Creating Motion Blur:

For motion blur, use a slow shutter speed. This technique is effective in capturing the movement of water, clouds, or busy city streets. To avoid overexposure in bright conditions, use a smaller aperture (higher f-stop number) or an ND (neutral density) filter to reduce the amount of light entering the lens.

3. Balancing Light

Shutter speed also affects the exposure of your images. A slower shutter speed increases exposure, making your images brighter, while a faster shutter speed decreases exposure, resulting in darker images. Balancing shutter speed with aperture and ISO is key to achieving the desired exposure.

Low Light Situations:

In low light, slow down your shutter speed to allow more light to reach the sensor. However, this increases the risk of camera shake. Using a tripod and a remote shutter release can help keep your images sharp.

Bright Conditions:

In bright conditions, you may need a faster shutter speed to avoid overexposure. Adjusting the aperture to a smaller size (higher f-stop) or lowering the ISO can also help control exposure.

4. Practical Tips

  • Use Shutter Priority Mode (Tv or S): This mode lets you set the shutter speed while the camera adjusts the aperture for proper exposure.
  • Experiment: Practice with different shutter speeds to see how they affect motion and light in your photos.
  • Review and Adjust: Use your camera’s LCD screen and histogram to review your shots and make necessary adjustments on the spot.

Understanding the science of shutter speed allows you to creatively capture motion and light, transforming ordinary scenes into extraordinary images. Experiment with different settings to discover the endless possibilities that shutter speed offers in photography.

Leading Lines

Leading lines are a powerful compositional tool in photography that can transform an ordinary image into an extraordinary one. These lines guide the viewer’s eye through the photograph, creating a sense of direction, movement, and depth. By effectively utilizing leading lines, photographers can enhance their compositions and draw attention to the main subject of the image.
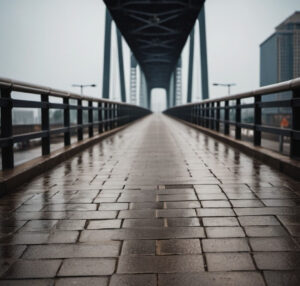
Leading lines can be found everywhere, from the natural lines in landscapes to the man-made lines in urban settings. They can be straight, curved, diagonal, or converging, and each type brings its own unique effect to the photograph. Straight lines, such as roads, bridges, or fences, create a strong sense of direction and can lead the viewer directly to the focal point. Curved lines, like rivers or paths, add a sense of flow and grace, leading the viewer’s eye on a more leisurely journey through the image.

In urban photography, leading lines are abundant and can include elements like staircases, railings, and architectural details. These lines can add structure and order to the composition, while also emphasizing the scale and perspective of the scene. Diagonal lines are particularly effective in creating a sense of depth and dynamism, making the image more engaging and visually interesting.

Converging lines, where two or more lines meet, can create a powerful focal point. This technique is often used in landscape photography, where the lines of a pathway or a series of trees converge towards a distant point, drawing the viewer’s eye into the scene and creating a sense of infinite depth.

Using leading lines effectively requires a keen eye and a thoughtful approach to composition. When framing a shot, take the time to look for natural or man-made lines that can enhance your image. Experiment with different angles and perspectives to see how the lines interact with the subject and the overall composition.

In conclusion, leading lines are a versatile and impactful element of photographic composition. By guiding the viewer’s eye through the image, they can add depth, movement, and focus, transforming your photos from simple snapshots to compelling visual narratives. Whether you’re photographing landscapes, cityscapes, or portraits, incorporating leading lines can greatly enhance the effectiveness and appeal of your work.

Depth of Field

Depth of field (DOF) is a fundamental concept in photography that can dramatically impact the look and feel of an image. It refers to the zone of acceptable sharpness within a photo, extending in front of and behind the main subject. Understanding how to control depth of field allows photographers to emphasize certain parts of their scene, adding depth and dimension to their work.

There are three primary factors that influence depth of field: aperture, focal length, and distance from the subject. The aperture, measured in f-stops, controls the amount of light entering the camera. A wider aperture (e.g., f/1.8) results in a shallow depth of field, where the subject is in sharp focus while the background is beautifully blurred. This effect is often used in portrait photography to isolate the subject and create a pleasing bokeh.

Conversely, a smaller aperture (e.g., f/16) increases the depth of field, making both the foreground and background appear sharper. This technique is particularly useful in landscape photography, where capturing detail throughout the entire scene is often desirable.

The focal length of the lens also affects depth of field. Longer focal lengths (telephoto lenses) tend to produce a shallower depth of field, even at smaller apertures. In contrast, wide-angle lenses typically provide a greater depth of field, which is useful for capturing expansive scenes.

Finally, the distance between the camera and the subject plays a crucial role. The closer you are to your subject, the shallower the depth of field becomes. This principle can be creatively employed in macro photography to highlight intricate details of small subjects while keeping the background out of focus.

Mastering depth of field allows photographers to guide the viewer’s attention and create a specific mood or atmosphere in their images. Whether you’re looking to achieve a dreamy, soft background or ensure that every element in your frame is sharp, understanding how to manipulate depth of field is essential.

In summary, depth of field is a versatile and powerful tool in photography. By adjusting the aperture, focal length, and subject distance, photographers can control which parts of their image are in focus and which are not, adding artistic expression and narrative depth to their work.

Rule of Odds

Photography is an art form that relies heavily on composition to create visually appealing images. One such compositional technique is the Rule of Odds. This principle is rooted in the idea that images are more engaging when they contain an odd number of subjects. But why does this rule work so effectively?

The Rule of Odds suggests that an odd number of elements in a scene is more interesting and dynamic than an even number. When we view an image with an even number of subjects, our brains tend to pair them up, creating a sense of symmetry and balance that can sometimes feel static or less engaging. In contrast, an odd number of elements prevents this automatic pairing, leading to a more intriguing and visually stimulating composition.

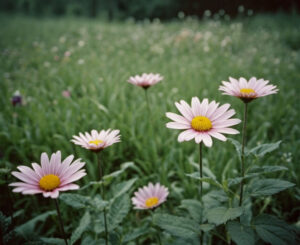
For instance, imagine photographing a trio of flowers instead of two or four. The three flowers create a natural focal point and allow the viewer’s eye to move around the image more freely. This movement helps maintain the viewer’s interest and adds a layer of complexity to the photograph.

The Rule of Odds isn’t limited to small objects; it can be applied to larger scenes as well. In landscape photography, incorporating an odd number of trees, rocks, or other elements can enhance the overall composition. This technique can also be effective in portrait photography by using groups of three or five people, which often results in more dynamic group shots.

While the Rule of Odds is a valuable guideline, it’s important to remember that photography is an art form with room for creativity and experimentation. Sometimes breaking the rules can lead to compelling and unique images. However, understanding and utilizing the Rule of Odds can provide a solid foundation for creating balanced and engaging photographs.

In conclusion, the Rule of Odds is a simple yet powerful tool in the photographer’s toolkit. By incorporating an odd number of subjects into your compositions, you can create images that are more dynamic, interesting, and visually appealing. Whether you’re a beginner or an experienced photographer, this principle is worth considering in your pursuit of capturing the perfect shot.

How can I use symmetry effectively in my compositions?

Symmetry in photography is a powerful compositional tool that can transform ordinary scenes into captivating images. Let’s explore how you can effectively use symmetry to enhance your compositions:

  1. Understanding Symmetry:
  2. Types of Symmetry:
    • Horizontal Symmetry: Divide the frame horizontally, creating a mirror image above and below the dividing line. Water reflections, architectural structures, and landscapes often exhibit horizontal symmetry.
    • Vertical Symmetry: Divide the frame vertically, resulting in a mirror image on the left and right sides. Portraits, doorways, and architectural columns are examples of vertical symmetry.
    • Radial Symmetry: Elements radiate outward from a central point. Think of a flower with petals or a circular staircase. Radial symmetry adds dynamism and draws attention to the center.
    • Bilateral Symmetry: The most common type, where the scene is mirrored along a central axis. It can be either horizontal or vertical. Bilateral symmetry creates a sense of balance and harmony.
  3. Finding Symmetry:
    • Natural Scenes: Look for reflections in water, glass, or polished surfaces. Calm lakes, ponds, and puddles often provide beautiful reflections.
    • Architectural Details: Buildings, bridges, and archways often exhibit symmetry. Explore urban environments for geometric patterns.
    • Still Life: Arrange objects symmetrically on a tabletop or use a mirror to create reflections.
    • Nature: Flowers, leaves, and butterfly wings often display radial symmetry.
  4. Creating Symmetry:
    • Center Your Subject: Position your subject at the center of the frame for perfect symmetry. Ensure that both halves are identical.
    • Leading Lines: Use leading lines (such as roads, fences, or pathways) to guide the viewer’s eye toward the symmetrical element.
    • Reflections: Capture reflections in water, glass, or other reflective surfaces. A calm lake or a puddle after rain can provide stunning reflections.
    • Post-Processing: Adjust your image in editing software to fine-tune symmetry. Crop, straighten, and enhance contrast if needed.
  5. Breaking Symmetry:
    • While perfect symmetry is pleasing, consider breaking it intentionally. Add an element off-center to create tension or interest. This technique is called asymmetry and can be powerful when used sparingly.
  6. Examples of Symmetrical Compositions:
    • Bridges: Capture the reflection of a bridge in water.
    • Portraits: Frame a face symmetrically, with the eyes aligned along the central axis.
    • Patterns: Explore repetitive patterns in architecture or natural scenes.
    • Geometric Shapes: Use squares, circles, or triangles symmetrically.

Remember that symmetry doesn’t always mean perfection. Sometimes slight imperfections add character and uniqueness to your images. Experiment, observe, and let your creativity guide you!